4 Ways To Improve Your Real Estate Photography
Luxury Real Estate Photography Tips
4 Ways To Improve Your Real Estate Photography: As a luxury real estate photographer, I’m always looking to bring my photography to the next level. I believe that in order to make remarkable images you need to constantly be learning and evolving. If you are like me you spend a too much time on the web looking at gear, reading blogs and looking at what other architectural and luxury real estate photographers are producing. Over the last year, I’ve drastically changed my methods for creating my luxury real estate images in a few distinct ways. Part of the change is a simple piece of gear, but the larger part of the change is my capture methods.
“The Canon 17mm T/S allows me to create architectural and luxury real estate images that were previously impossible to create.”
1. Gear
My go to camera is a Sony a7S II. I purchased the a7S II, mirrorless, full frame 12mp camera a few months ago. Previously I was using an a7S [first generation] for most shoots. When I know the property I’ll be photographing will appear in publications I’ll photograph with a Sony a7R II, mirorrless, full frame 42mp camera. Due to the 5-Axis SteadyShot INSIDE Stabilization on the a7S II, the captures are noticeably sharper than the a7s first generation. The a7SII or a7S is plenty enough for publications. But the a7R II give me an edge and really brings out the smallest details with over three times the resolution of the a7S and a7S II. Previously, my go to lenses were either the FE 24-70 f/4 ZA OSS and the FE 16-35 f/4 ZA OSS. The most dramatic change came when I purchased a Canon 17mm f/2.8 Tilt Shift lens. To say that this lens has been a game changer would be an understatement. It’s been revelatory. The Canon 17mm T/S allows me to create architectural and luxury real estate images that were previously impossible to create in a single frame capture.
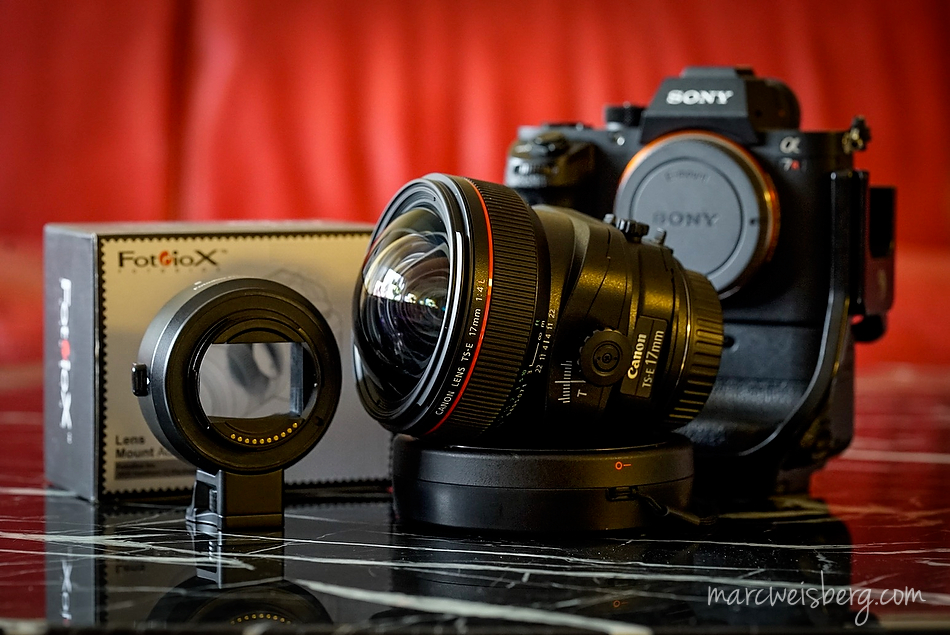
The Canon 17mm T/S allows me to create architectural and luxury real estate images that were not impossible to create previously. What I do, is lock off the Tilt feature and only use the Shift feature. Before using this lens Tilt and Shift were only a concept that lived in words. When I finally had an opportunity to used a Tilt Shift, the heavens opened up and angels started to sing. Here is a Canon 17mm f/2.8 Tilt Shift review with before and after images. In a nutshell, the 17mm T/S allows me to do two things easily, a} Shift the perspective up or down, and while keeping the verticals and horizontal lines straight with no change in perspective 2} Gives me superbly sharp images.

Here’s an image made with the Canon 17mm T/S lens mounted on the a7S II. Had I attempted to make this image with the FE 16-35mm f/4.0 ZA OSS it would have been extremely distorted with the vertical lines converging towards the top of the frame.
Because the lens is fully manual even on a Canon body, focus peaking is used, I opt for the color yellow to pull focus and typically operate between f/7.1 and f/13. A Metabones IV adapter is used to couple the 17mm T/S to any of my Sony 7 series cameras or the E Mount a6000 or a6300. There are less expensive adapters, but I found that using a Fotodiox was producing flare. So I ponied up the extra cash and purchased the Metabones IV wich works flawlessly for me. Mounted on the a6000 or the a6300 the Canon 17mm T/S {does double duty,and} now becomes a 24mm T/S with the 1.5X crop factor. My first, recommendation is to get a Canon 17mm f/2.8 Tilt Shift lens.
One ground-breaking feature that Sony pioneered is the ability to adapt almost any type of lens to its a7x system. It’s possible to use Canon, Contax, Leica, Nikon, Voigtlander and the list goes on and on. Now with the Techart Pro adapter, it is possible to auto-focus Zeiss ZM manual focus lenses on the Sony a7x series.
2. Using Speedlights
I’ve always use speed lights when photographing interiors. Speedlights are small, highly portable and inexpensive. They can be bounced off walls, wall and ceiling corner joints, used with light modifiers such as bounce umbrellas, and shoot-thru umbrellas and modified with grids from Mag Mod. My speedlights of choice are the Neewer TT850’s {the operate off of Li batteries} I own 6 and they live in my Pelican 1510 case. Contrary to the Amazon reviews, I have nothing but great things to say about the Neewer TT850 flashes. The Neewer TT850’s require a small add-on receiver $16 each, and a transmitter which goes in the camera hot shoe. I’ve been using them for about two years and they work flawlessly for me. They are fully manual. You don’t want to use TTL in general because it is unpredictable and unreliable and will give you varying results each time the flash pops off. Instead, I use full Manual mode to ensure that my flash durations and output are consistent. Other photographers use the Yongnuo YN560 IV speedlites with great success. A steal at under $90, plus they have built in radio triggers. Both speedlights are incredibly affordable, coming in at under or just above $100 per unit. Recently I purchased the Godox Ving V860II-S 2.4G TTL Li-on for my event and on-location portrait work. Coming in at twice the price the Godox offers TTL and a built-in radio slave. The Godox is built very well, I’d say on par with the Canon Speedlite 600EX-RT, with just as many features but at half the price. If you are like me and need flashes for more than luxury real estates interiors you may want to think about purchasing the Godox flashes that can do double duty for you to get the most bang for your buck.
Using speedlights for interior real estate photography does a few things:
1} The obvious: Speedlights illuminate shadow areas.
2} Speelights eliminate color casts.
3} Speedlights help give accurate color rendition and visually sharper images.
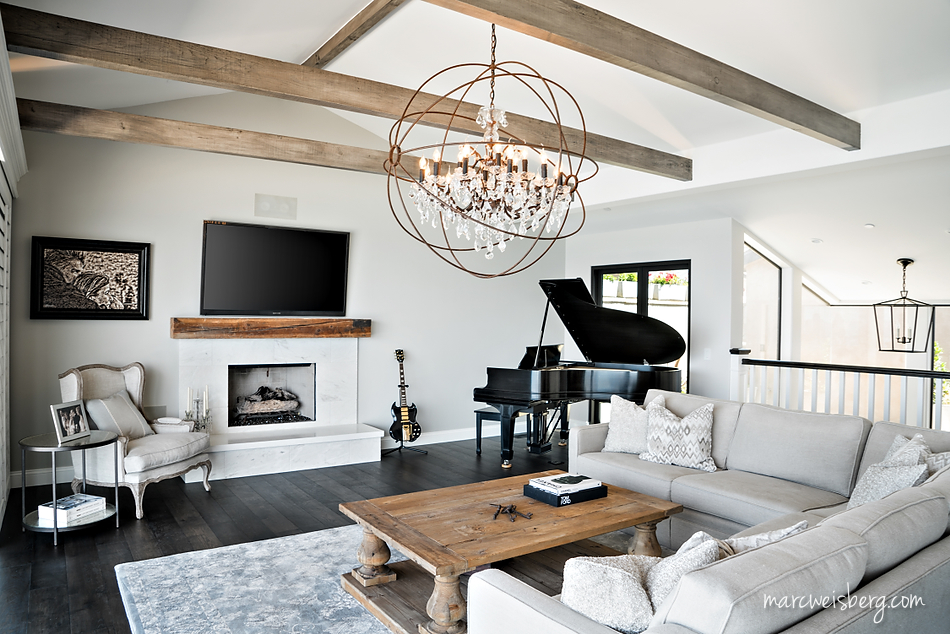
Final Image: In this frame, I’ve added a single Neewer TT850 speedlight in a silver, 30″ bounce umbrella, camera left at 1/4 power. Notice how the color cast on the far right wall is cleaned up and how the shadow areas open up. Color is vibrant and architectural and furniture lines appear sharper. I’ve used the ambient layer, as a layer mask, on top of the flash layer to lightly brush in a bit of ambient to take away any harshness that the flash may have left. A gradient is dropped over the television to give it a realistic look and to take away unsightly reflections. To my eye, this looks like a totally believable frame that doesn’t seem to be lit. Be careful when using speedlights that reflections do not appear on reflective surfaces, such as glass, and shiny surfaces like the 1901 Steinway baby grand piano. When working with speelights, subtlety and finese is the key. Both frames are captured with a Sony a7R II and the FE 24-70 f/4.0.
3. Ambient Exposures
Over the last few months, part of my shooting regimen has changed. I now make sure that in addition to a flash capture, I also capture an ambient layer. The ambient layer will be masked in to soften the flash layer giving the final photograph a more natural look. No matter how careful I am when using my speedlights, there are times when there are telltale signs that a flash was used. A subtle or not so subtle shadow may appear from the flash capture. Ambient layer masking can soften shadows and even take them away. Yes, it takes a little more time to do this type of masking and retouching but it also elevates my style and offers a more polished end product to my clientele.
4. Window Pulls
The easiest way for me to me to describe a “Window Pull” is: When photographing an interior you are typically exposing for the ambient interior and adding light to open up the shadow areas. Most of the time, the exterior ambient exposure is several stops above {brighter} than the interior. So, a window pull is using a method used to “pull” the exterior/outside exposure back into key and match or come closer to the interior exposure. This is how our eyes see it. But, our cameras are not capable capturing such a wide gamut of dynamic range. Often you will see blown out windows, where the view outside is overexposed. A window pull method is used to bring back/pull back the exterior/outside exposure into key, so that it is no longer overexposed. However, there may be times when you may want to purposely overexpose the exterior. If the view is ugly outside then I’d opt to over expose the exterior/outside. Or if the view is not essential to telling the narrative of the property.
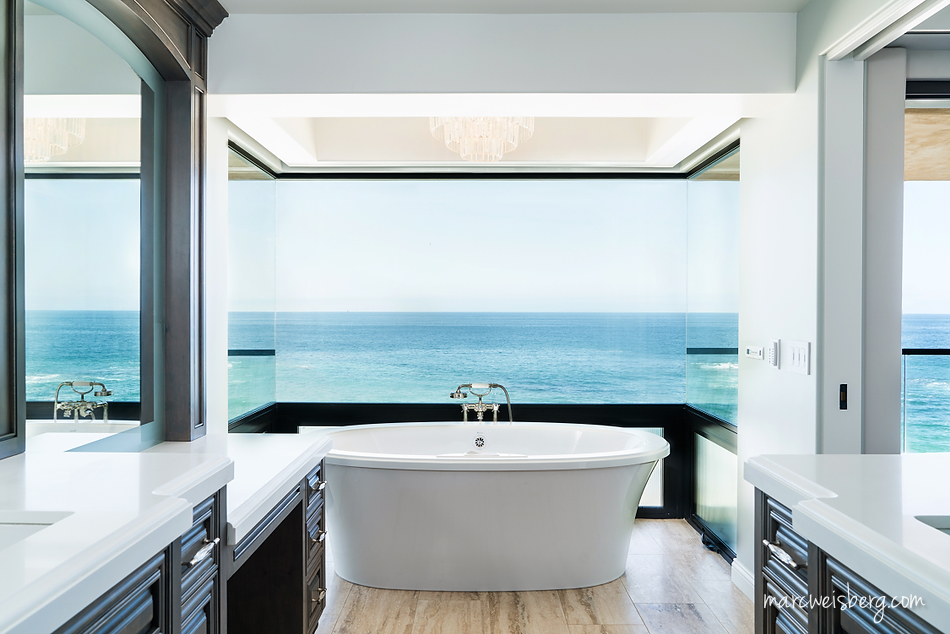
This is the final image created with three exposures {see below}. I’ve masked in the Window Pull with the Darken Layer Mask method {see video below…coming soon}. Masked in the bathtub hardware from one of the speedlight captures. Painted in the bathtub and floor a bit from the ambient capture, directly below.
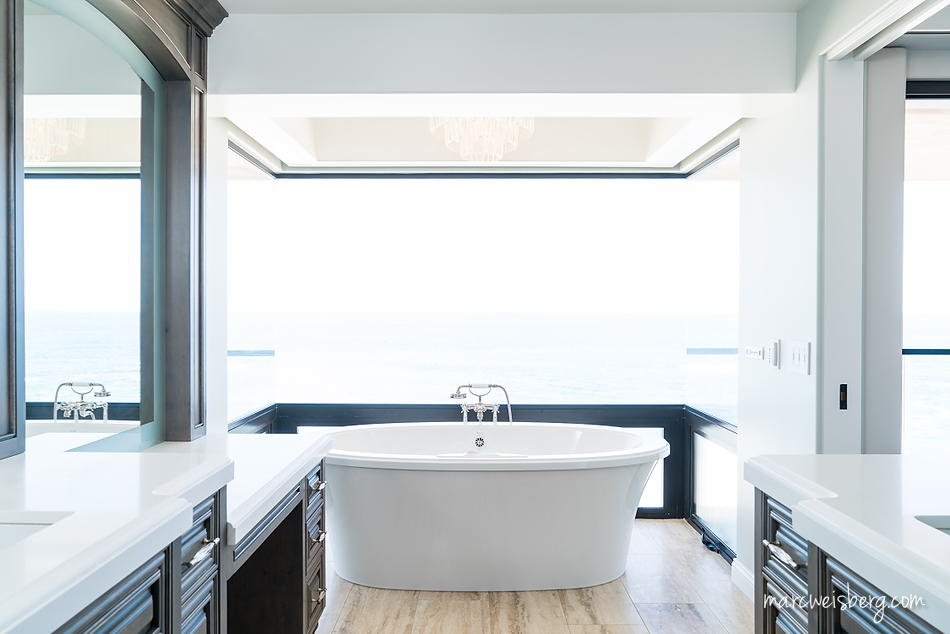
My first exposure. One ambient exposure, exposing only for the interior scene.
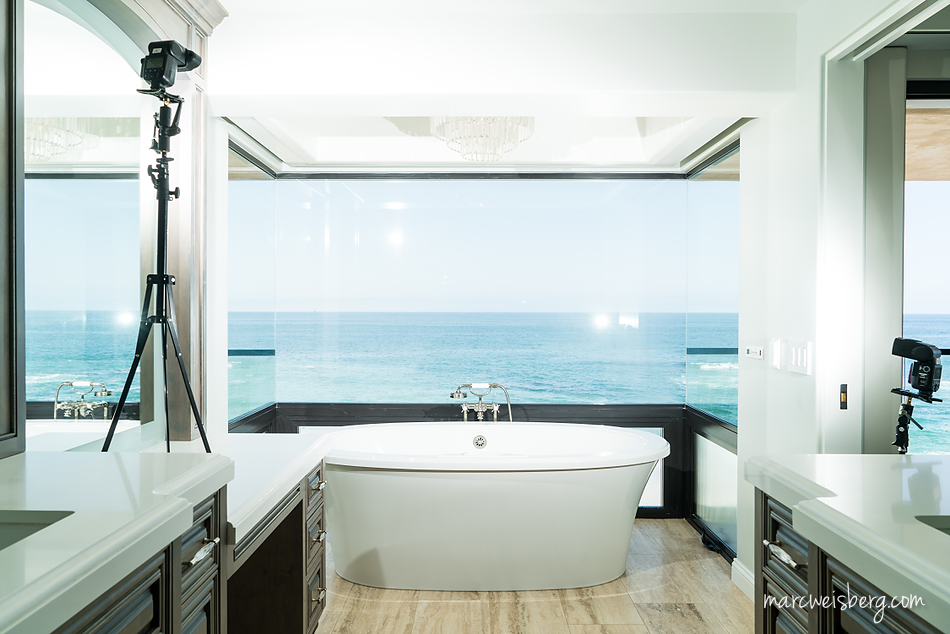
A second exposure. Expose only for the exterior scene, as close as possible to what my eye sees, and aim my speedlights, angled slightly, towards the center of the window, at 1/4 power for my Window Pull. The take-away here is to over-expose the surrounding window frame, and walls if they are in line with the window view. In Darken Mode, using a Layer Mask, you will paint in all the darker areas. If your surrounding and/or overlapping area is not over-exposed sufficiently, you’ll end up with those parts which match the interior exposure in the final frame and it will not look correct.

Third exposure. Get a perfectly exposed exterior/outdoor frame, as close to what my eye sees. I’m not concerned with the interior exposure at all. You’ll want this ambient exterior/outdoor capture to be exactly that same as your flashed capture above. This capture will be used as a Layer Mask to mask out the speedlight glares/reflections in the frame directly above.
Various ways of doing a window pull: You can a} Make a tedious selection using the Polygonal tool or the Pen tool in Adobe Photoshop, b} Do a separate exposure of the exterior/outside and mask it in…..very difficult and time-consuming c} The easiest method: Add a flashed layer of the window, captured at the perfect desired exposure, make that exposure into a Layer Mask, and use Darken Mode in Adobe Photoshop to easily paint in the window exposure. I’ve aptly named this the Capili Method, after Wayne Capili who developed it. Details below.
Recap: 4 Ways To Improve Your Real Estate Photography
- Use a Tilt/Shift Lens to shift perspective {up or down} and avoid perspective distortion.
- Use Speedlights for cleaner more vibrant and sharper images.
- Use Ambient Exposures to paint in ambient lighting over the flashed exposure for a more natural and pleasing look.
- Use the Capili Window Pull method to easily mask and paint in the exterior/outdoor exposure.
Recent Comments