Photographing Luxury Real Estate with the Sony α7S
#SonyAlpha α7S Real World Review | Photographing Luxury Real Estate
Gear: #SonyAlpha, α7S, FE 16-35mm f4 Z OSS, FE 24-70mm f4 Z OSS, FE 70-200mm f4 G OSS, Enduro CT314 tripod, Neewer TT850 Li-Ion Flash, Pocket Wizard Plus III’s.

Photographing Luxury Real Estate with the Sony α7S
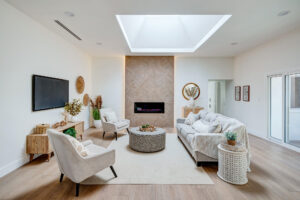
I had a wonderful opportunity recently to photograph a luxury real estate, custom, Southern California home, listed at $4.5m for one of my top real estate clients. I used my #SonyAlpha α7S for the shoot. I’ve had the α7S now, for a few months and am super comfortable with it. The two day shoot took place in a private gated community in Laguna Niguel. Two days were needed due to the size of the home and twilight shoots were requited. One twilight shoot for the front exterior of the property and another for the back yard with a sline pool and spa, and views of the Pacific ocean. Plus this luxury home is situated on 1/4 acre of land with 7 bathrooms, 5 bedrooms, two living rooms, a gymnasium and more. With the exception of two interior images that were mulit-exposure created with Enfuse, all the rest of the interiors were lit with the Neewer flashes. Previously I did a Sony a7II Real World Review here.

The α7S dynamic tonal range is amazing. It can handle anything that I throw at it. During the shoot I was dealing with dark walls and dark ceilings in the downstairs, with glaringly bright windows. Both had to be brought into check with either creating enough artificial light with my off camera flashes. Or by capturing the ambient and flashed interiors and using a second frame of the exterior and compositing the properly exposed exterior window view into the final images. My Sony ZEISS glass never, ever gave me any CA which is a blessing in itself. Because I didn’t have to do any work on the post side in Adobe LR to compensate for CA. The images produced by both the ZEISS glass and #SonyAlpha full frame is clean and super sharp right out of camera. Of course I’m capturing RAW and massaging the images in both Adobe LR5 and Adobe Photoshop. Using the superbly fast Efnuse desktop GUI for any multi frame images, like the outdoor exterior twilight images. I recently got the Enduro tripod and will have to do a review on that at a later date. I will say that its the first time in a decade and only the second time ever I’ve purchased a pro level tripod to replace my Manfrotto steel legs that I started out with 15 years ago.
You can not tell the difference between ISO 200 and ISO 800 on the α7S.


Back to the #SonyAlpha α7S. I’m on Manual the whole time, changing aperture and shutter speed as needed and occasionally ISO for some of the darker rooms. For the most part I’m sticking to ISO 200 for a few images I’m heading North to ISO 800 for a couple of ambient captures I did like the office, which needed no flash. That being said the α7S plays nicely and perfectly with my Pocket Wizards. No issue with the communication at all. I’m tethered in to the onboard mini USB port with a cheap remote to trigger that I’m using for bracketing. I picked it up for about $25 and it works just fine. The only downside is that there is no on off switch so you put the batteries in and take them out when your finished or they’ll run down. Stupid I know but the only one I could find that was compatible with the α7S when it first came out. You can not tell the difference between ISO 200 and ISO 800 on the α7S. So it was never an issue to change ISO’s. I’d also be super comfortable shooting at 6400 or even 10,000 for my luxury real estate if needed because the images are clean even at the upper ISO.


Tile Menu: The Tile Menu is a great way to quickly access commonly used camera functions. Setting up the Tile Menu on my α7S is super easy way for me to access the majority of functions that I commonly use for my luxury real estate photography…Such as: Single of multiple frame capture, Bracketing, White Balance and ISO. How to turn on your Tile menu on the α7S or α7II: Simply go to Menu –> Set Up {suite case icon}, choose menu item 2 – Tile Menu –> On. Now anytime you press the Fn button on the rear of the camera, the Tile Menu will be visible. This will allow you to access commonly used menu items.


#SonyAlpha Wifi – On Board: This coming weekI’m going to be doing a separate post on Wifi settings for both Wifi Tethering and Wifi remote shooting via iPhone. The α7S and α7II both have Wifi on board. As a result I can not shoot tethered to my iPad and I’ll be using this next week when photographing a luxury real estate home for a Newport Beach based interior designer. Its allot easier then having to bring my MacBook Pro with me and hard wire a tether set up and use my Tether Tools lap top stand on a separate tripod stand.


Lenses: As I mentioned above, during this shoot I used the following Sony E Mount lenses: FE 16-35mm f4 Z OSS, FE 24-70mm f4 Z OSS, FE 70-200mm f4 G OSS. Each lenses provided me with accurate focus, crystal clear images and no CA {chromatic aberration}. As I’ve mentioned in previous posts, the FE 16-35mm f4 Z OSS captures do have barrel distortion. However it is easily fixed with the click of a button by choosing Lens Calibration –> Basic and then choosing Enable Lens Profile Correction, plus a possible tweak in Lens Correction –> Manual: check Constrain Crop and play with either Vertical, Horizontal and Distortion.


