HOW TO CREATE A WINDOW PULL IN ADOBE PHOTOSHOP
WHAT IS A WINDOW PULL AND HOW IT CAN CREATE VISUAL IMPACT.
HOW TO CREATE A WINDOW PULL IN ADOBE PHOTOSHOP
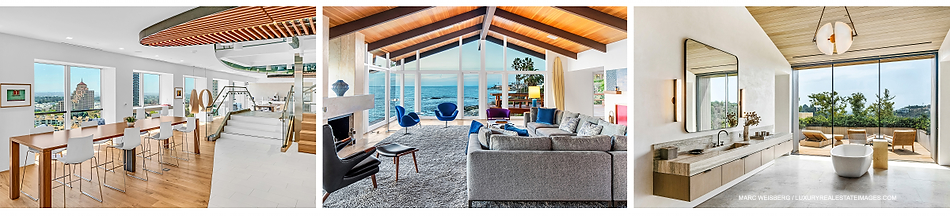
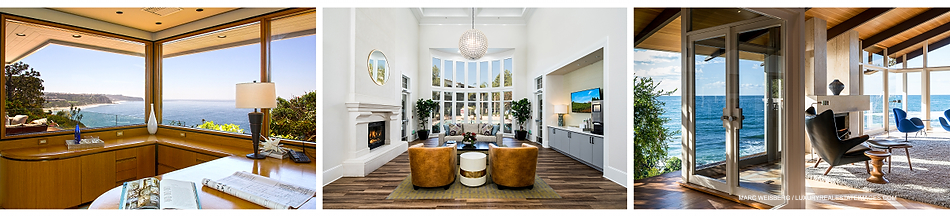
A window pull is a technique used by real estate photographers to give a clear view of the outside. It entails bringing in the vista from the window and making it evident in the photograph. Using the techniques in this tutorial, you’ll have complete control over the intensity of the view beyond the window, which you may adjust using Adobe Photoshop’s layer opacity.
WHY USE A WINDOW PULL?
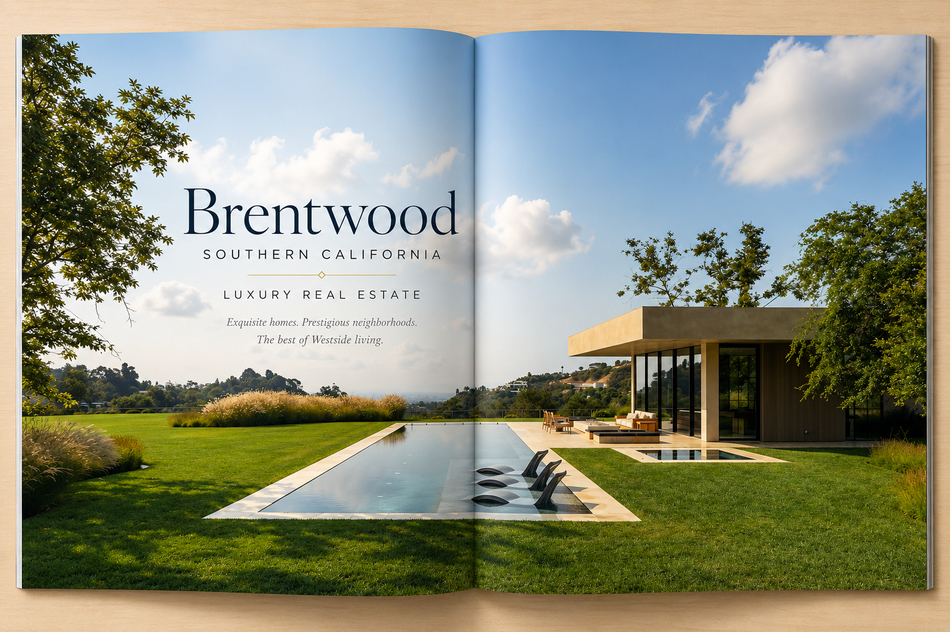
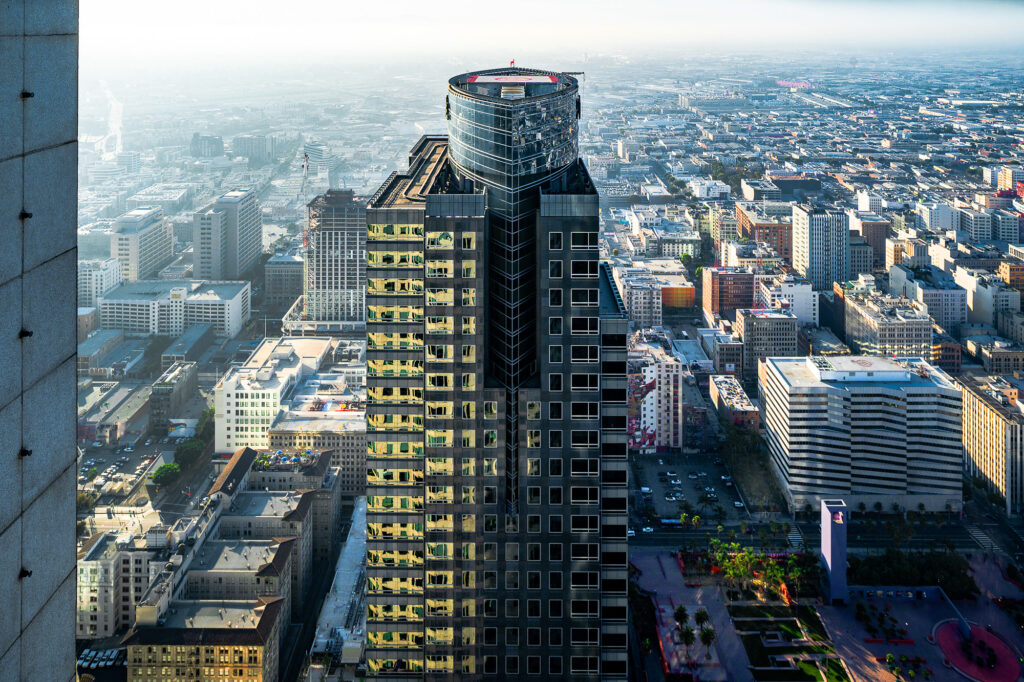
As a luxury real estate photographer, whether I’m photographing residential or commercial real estate properties their geographical location can be as important as their interiors. Some have fantastic views of the ocean and some have fantastic views of the city. But those amazing views aren’t always possible to include in a single frame exposure. Here is an easy way to include both the interior and exterior views with a little magic from Adobe Photoshop. If this is your first time using this technique it may seem daunting. But stick with it and it will become second nature for you. Personally, I don’t even think about the technical aspects of the Window Pull technique anymore. I just create the frames and the editing in PS comes naturally.
HOW TO CREATE A WINDOW PULL
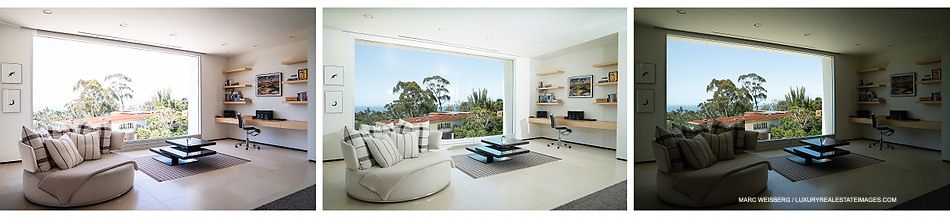
Digital cameras these days are amazing. However, they don’t possess the dynamic range that we can see with our eyes. I don’t know the hard science but I’m going to say that part of what we see is a brain trick. Our brains are able to simultaneously see the perfect inside interior exposure and the perfect outdoors exterior exposure simultaneously. Cameras however are not able to do this. On a bright day, take an image of an interior that has a gorgeous exterior view. You’ll quickly notice when you capture a perfectly exposed interior the exterior (or outdoor) exposure will be blown out or overexposed. As good as modern-day cameras are, the dynamic range simply is not capable of capturing the huge difference between these two exposures. But using Adobe Photoshop and the technique known as a “Window Pull” you can easily create impactful images that show off both a gorgeous interior and a beautiful exterior view. There is a way to get these two perfect exposures in harmony using Adobe Photoshop. The process of creating a successful “Window Pull” takes a bit of setup. But with practice, it is easy to perfect.
Below are the exposures that you will need to create a successful window pull.
To create these three exposures you’ll need to have your camera securely locked down on a tripod. You may want to use a tethered shutter release. I’ve found that I don’t need a shutter release when using a mirrorless camera. But I have lots of experience doing it and am very careful not to move my camera. If you encompass any camera movement there is a fix for that, that I’ll cover later in this tutorial.
Four Steps to Create Your Window Pull
- Basics: Your camera is on a tripod and you have composed the framing for your image. I try to work with an aperture of f/9.0 when possible. Your ISO and shutter speed will need to be adjusted for how light or dark your interior is.
- Create the Perfect Interior Exposure. You’ll be exposing only the interior for this frame. Whether you use strobes or not is up to you.
- Window Frame Flash Exposure. This is your most crucial frame. In order for this Adobe Photoshop technique to work for you, you have to nail this exposure. Your goal is to expose only for the exterior ambient exposure just like you did in step 3. You’ll need to make certain that your shutter speed is either 200th/sec or below. Even though some camera manufacturers state that their maximum synch speed is 250th/sec., I’ve found for this technique a 200th/sec shutter speed works the best. The extra step you’ll be making here is that you’ll want to position your strobe or strobes to light the surrounding area of the window frame and any objects in front of the window frame and light it by a minimum of one-stop above all your other captures. You don’t need to be precisely 1 stop above but you do want to make sure the area surrounding the window is considerately brighter than all your other frames. It takes a little bit of practice to get this technique down but when you do you’ll be amazed at the results you can get and how simple it becomes.
- Take the Perfect Exterior Ambient Exposure. For this frame, you are only concerned with the perfect exposure of the view outside the window. Use a circular polarizer if you’d like to get rid of any reflections but be careful of artifacts that may occur when using the circular polarizer. Turn off all interior lighting to minimize any reflections on the window. There are times depending on how bright it is outside that you may need to change your ISO to get your shutter speed at 200th/sec or below. If you need to adjust your ISO be as careful as you can that you do not move your camera’s framing position.
Post Production in Lightroom
I photograph in RAW mode. I Import the RAW images into Adobe Lightroom and apply a preset for color, contrast, shadow, saturation clarity etc. Then, I use the Transform module > Upright tool to make sure all my verticals and horizontals are perfect. Make sure to keep the color, density, and exposure of all your exterior ambient exposures exactly the same from frame to frame. Next, export your frames as high-resolution Jpegs.
Assembling the Window Pull In Adobe Photoshop
You’ll want to familiarize yourself with layers and masking.
- Create 3 Layers: Open all three of your Jpeg frames in Adobe Photoshop.
- Aligning and Creating Your Layers: You are going to create a three-layer image in Photoshop. There are two ways to do this. a) From Lightroom: Choose your images, Right-click > Edit In > Open as Layers in Photoshop. b) From Photoshop: Open your three images. Each time you move an image onto the existing image you are creating a new Layer. You’ll be Using Option Shift on a Mac or Alt Shift on Windows when you drag and drop your images. Doing this will position your 2nd and 3rd frame precisely aligned on your first layer. If you have had any camera movement (in order to make sure everything is perfectly aligned) do the following: Select all layers and choose Edit > Auto-Align Layers, choose Auto and click OK. Now all your layers are perfectly aligned.
Photoshop Layers: Make Sure Your Frames are in this Layer Order
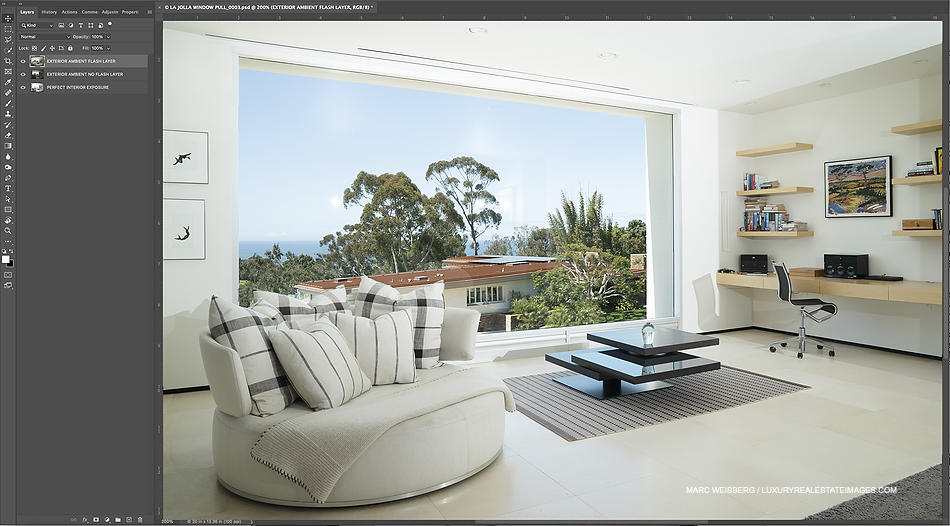
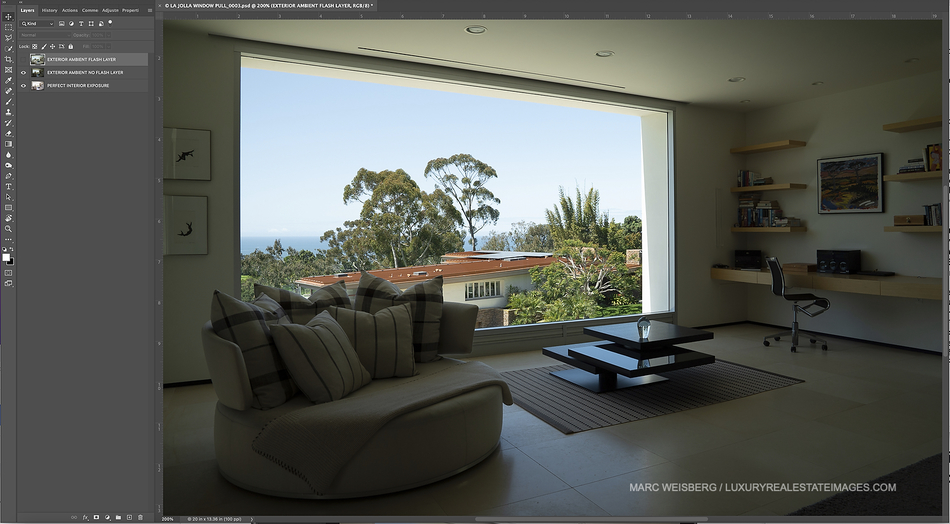
HOW TO CREATE A WINDOW PULL IN ADOBE PHOTOSHOP
- Layer 1: Your topmost layer will be your Exterior Flash Frame layer.
- Layer 2: Your second layer will be your Exterior Ambient frame (with no flash).
- Layer 3: Your third and bottom layer will be your Perfect Interior Exposure layer.
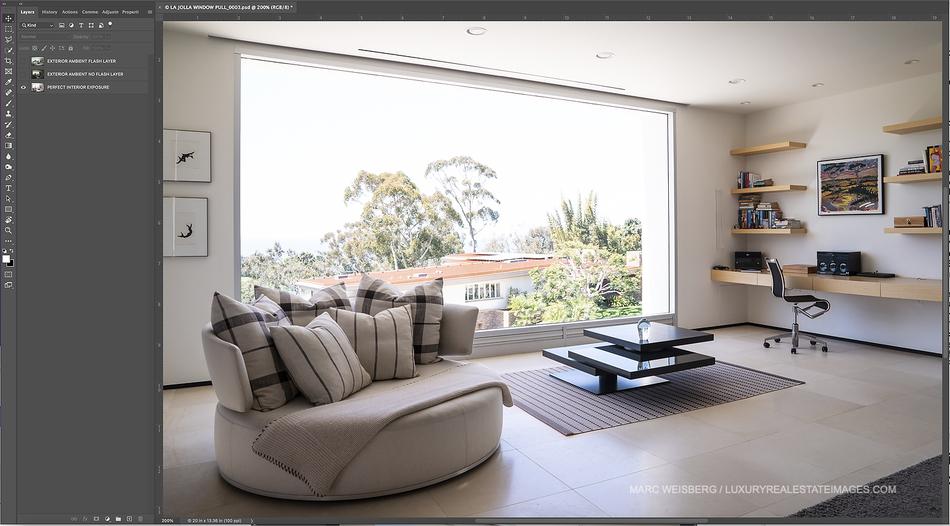
- Creating Your First Mask: Create a mask (hold the Option key on a Mac / Alt key on a PC and click on the Mask icon) for your first/top layer and change the blending mode to Darken.
- Creating Your Second Mask: Create a mask for your second layer (hold the Option key on a Mac / Alt key on a PC and click on the Mask icon).
- Painting in Your Window View: To paint in your window, you’ll need to click the mask of your first layer and paint in the window of your image using the Brush tool with these settings: White at 100% opacity, 100% flow, and watch the magic happen. Do your best to keep your painting on the inside of your window frame. If you make a mistake and paint outside the frame and it looks too dark, just switch to Black and it will erase or reverse your darkened area.
- How to mask out or get rid of window reflections: Click on your mask for the Ambient Exterior layer. You’ll use this layer to perfect your images and hide or mask out any window reflections. Paint with white and you’ll see the reflections disappear.
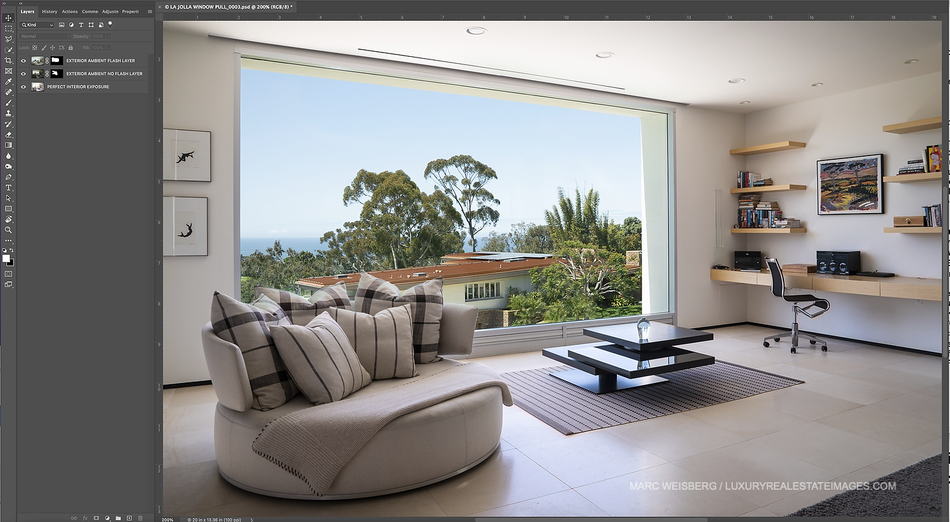
- Changing the Intensity of the Window Pull: At this point, you can choose to adjust the intensity of the window view by flattening the Exterior Flash Frame layer & the Exterior Ambient frame (with no flash) and lowering the layer opacity.
- Saving Your Image; Make sure everything looks perfect and choose Layer > Flatten and save the images to the appropriate folder as a Jpeg.
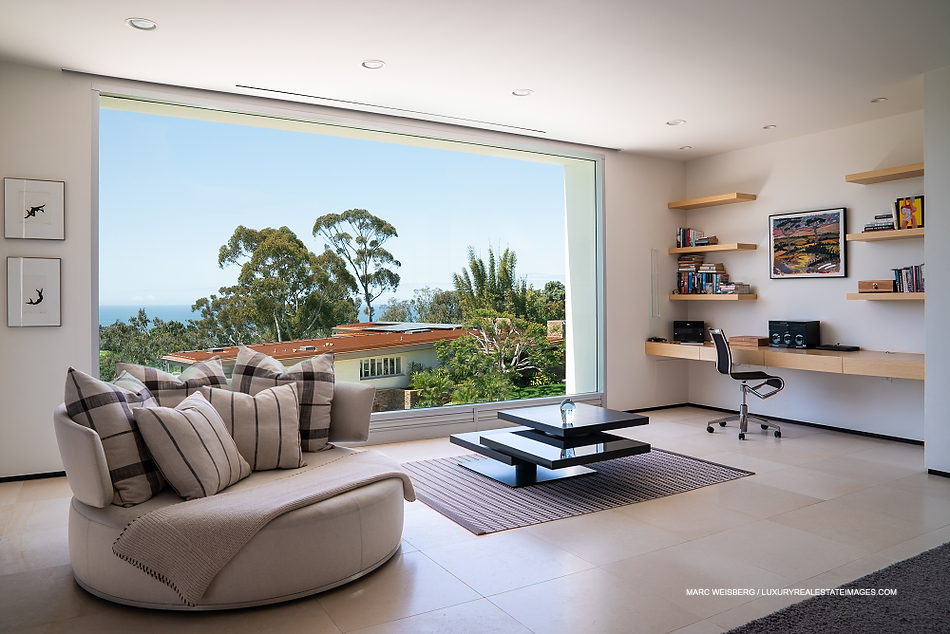
- Congratulations!: You just created your first Window Pull!
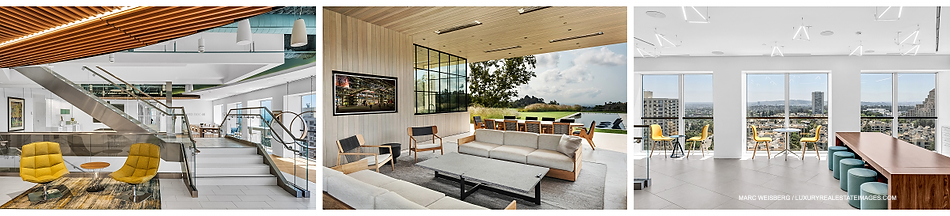
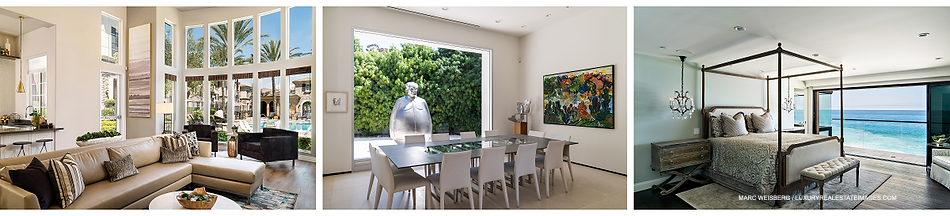
About the Author: Marc Weisberg is a Luxury Real Estate photographer and educator living in Southern California where it rarely rains and never snows. His fascination with photography began when his father gave him his first camera when he was thirteen years old. From Luxury Real Estate + Architectural Photography you’ll find Marc’s trademark – magazine quality imagery published in magazines and books nationwide. With an impressive client list spanning 20-plus years, Marc has photographed countless architectural & luxury real estate projects from Southern California to Paris. A Brief Client List: CBRE, Westfield, Lennar, Berkshire Hathaway, Merril Lynch, and Sotheby’s International. Residential & Commercial Real Estate Photography Commissions: Homes and estates ranging from $2m – $70m, snd commercial architectural projects from $10million to $1billion plus.